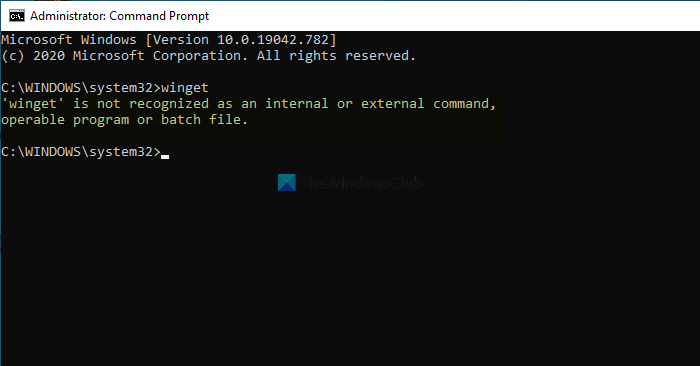
The entire error message says: You may see this error when you try to enter the winget command in an elevated Command Prompt window.
Winget not recognized in Windows 11
If Winget is not recognized in Windows 11, follow these steps: To learn more about these steps, continue reading.
1] Download or update App Installer
It is the very first thing you need to do to get the winget command working on your Windows 11 or Windows 10 computer. The App Installer is not any regular package that you can find on the Microsoft Store. It is one of the most important components of your Windows 11 computer since it contains the winget and various utilities. If you disabled or uninstalled it by mistake, you will encounter the aforementioned error on your PC. On the other hand, if you haven’t updated this package for a very long time, a similar problem might arise. That is why it is recommended to verify if you have the latest version of App Installer on your computer or not. For that, you can head to the Microsoft Store and find the App Installer package. Alternatively, you can visit this page at microsoft.com to open the Microsoft Store and install or update the package accordingly.
2] Download Winget from GitHub
If you are unable to download the winget from the official repository or the Microsoft Store, you can always download or update it from GitHub. As you are using Windows 11, there won’t be any compatibility issues while installing or updating the package. If you do not have the package on your computer, you can find the Install option. However, if you already have the package, you can find the Reinstall option. Once you go through that screen instructions, you will be able to use winget commands on your computer without any problem. If you like, you can download the Windows package Manager from github.com.
3] Set the correct path
By default, Windows 11 keeps the winget.exe here: %userprofile%\AppData\Local\Microsoft\WindowsApps. However, if it is removed from there, you can follow the aforementioned steps to get it back. On the other hand, if your path is incorrect or you changed it earlier to test something in the past, you need to set the correct path in the Environment Variables section. To set the correct winget.exe path, follow these steps:
Search for environment variables and open the individual search result.Click on the Environment Variables button.Select Path and click the Edit button.Select the existing path and click the Edit button.Enter this: %userprofile%\AppData\Local\Microsoft\WindowsAppsClick the OK button.
Next, restart your computer and check if it resolves your problem or not.
How do I get Winget in Windows 11?
To get Winget in Windows 11, there are mainly two methods. First, you can follow the official method, which is by using the Microsoft Store. You can head to the Microsoft Store and find the App Installer. Then, you can install the package on your computer. On the other hand, you can visit GitHub to download the same package.
What can I install with Winget?
There is no fixed list of apps you can install using Winget command-line utility. However, you can install OneDrive, Google Chrome, Firefox, etc., without any problem. On the other hand, it is possible to update all installed programs at once using WINGET. That’s all! Hope this guide helped. Read: Bulk install Windows apps with Winstall GUI for Windows Package Manager.

