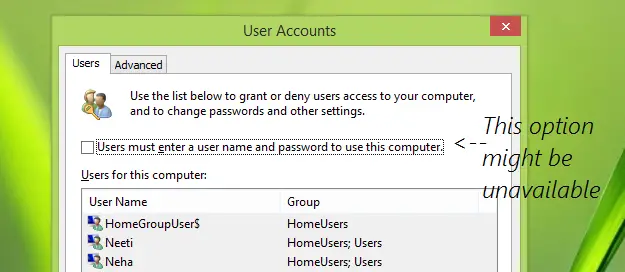
We have shared the method to enable auto login earlier. In that method, we have unchecked the Users must enter a username and a password to use this computer option under User Accounts window. But you may find the Users must enter a user name and a password to use this computer missing in User Accounts. If you face this issue, read on.
If you’re using a domain-controlled system, this crucial option may be missing. In that case, you need to ask the domain controller to uncheck that option from the controlling machine. But if you’re on a non-domain system, and you are still missing the option, then this article will help you to enable automatic logon using registry manipulation.
Windows 11 or Windows 10 Auto login is not working
Making mistakes while manipulating the registry could affect your system adversely. So be careful while editing registry entries and create a System Restore point before proceeding.
Press Windows Key + R combination, type put regedit in the Run dialog box and hit Enter to open the Registry Editor.
Navigate here:
In the right pane of the above-mentioned registry location, you need to make sure that the following data exists. If something is missing, you can add it:
AutoAdminLogon – Registry String (REG_SZ) – Value data is 1.DefaultPassword – Registry String (REG_SZ) – Value data is your user account password.DefaultUserName – Registry String (REG_SZ) – Value data is your user account name.
Hence add the missing information, if any, and once you’re done, close Registry Editor and reboot. After restarting the machine, you should have auto-logon enabled. Trust it helps! This post will show you how to display information about previous logons in Windows.