Stop computer from automatically locking Windows 11/10
If your PC is getting locked automatically, then you need to disable the lock screen from appearing automatically, by following these suggestions for Windows 11/10: These tips might sound too naive, but trust me, sometimes these small settings, especially those default values, create more problems.
1] Disable or Change Lock Screen timeout settings
You need to disable the Lock Screen. You can use our Ultimate Windows Tweaker to do it with a click! You will find the setting to Disable Lock Screen under Customization > Modern UI > Lock Screen. If you do not want to disable it, check the sleep timeout settings, screen timeout settings, screensaver, and so on. These are the basic settings that you should check.
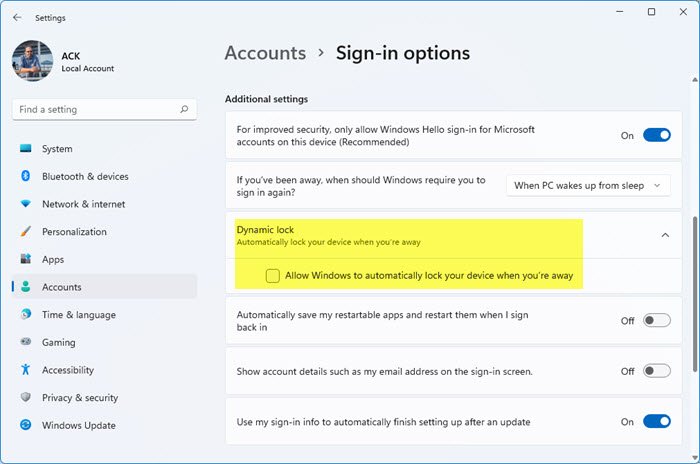
2] Disable Dynamic Lock
Apart from using PIN or Password, you can also use Dynamic Lock. It is useful for those who keep forgetting locking the device. Dynamic lock uses Bluetooth devices. Every time the Bluetooth device is out of range, the computer is locked. So make sure the device is nearby or uncheck the option which says, “Allow Windows to lock your device when you’re away automatically.”
3] Disable Blank Screensaver
If you use a screensaver, ensure that it’s not set as blank. The problem is that you will never know that a screensaver is running.
Type Screensaver in the Search barClick on Change ScreensaverIn the dropdown, check if it is set to blank.If yes, change it to None.
Press Apply and exit.
4] Change System unattended sleep timeout
Available under Power Settings, the System unattended sleep timeout setting is the idle timeout before the system returns to low power sleep state. The default time is set to 2 minutes for both, i.e., when running on batteries and plugged. Change it to a higher value, so that the PC doesn’t get into Sleep mode too quickly. If the setting doesn’t appear in Power Settings, you can manually add it using PowerShell and Registry PowerShell method Use Win + X and then select PowerShell(admin) Type the following and hit Enter: Exit and check. Registry method
Open Registry Editor and navigate to: Change the value of the “Attributes” key from 1 to 2. This will enable the System unattended sleep timeout in the Power Options. Now you can change this setting. We hope these tips were useful enough for you to resolve the problem where your Windows 10 PC keeps getting locked automatically.